In part 1 of this blog series I provided an introduction to Azure Governance and why this area is of importance to a successful adoption of Azure as one of your cloud platforms .
Part 2 gets you going with assigning your first policy and covers the following:
Planning your first policy, assigning a built-in policy and managing an exclusion
Planning:
When it comes to technology we often forget the importance of planning. This is simply because unlike other industries we are able to dive in deep without being blocked. It is in my opinion, simply a case of “just because you can does not mean you should”. Here are some building blocks to consider before you create your first policy assignment.
| Azure Policy Terminology | Description |
| Policy | A compliance testing rule with action: Audit, Allow or Deny |
| Initiative | 1 or more policies grouped together |
| Scope | What level to apply the policy or initiative (Management Group, Resource Group or Resources) |
| Exclusion | Exclude from policy or initiative (similar to group policy block inheritance) |
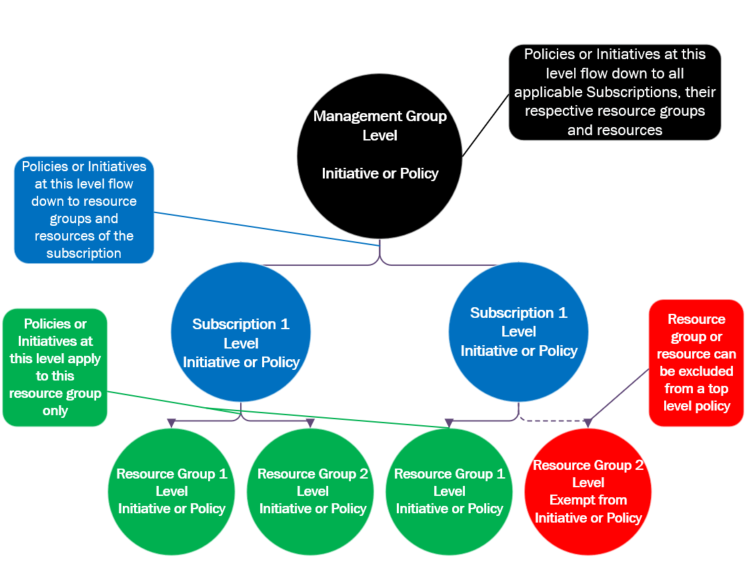
When you create an initiative or a policy, you can apply it at various levels. The level you apply the policy narrows or widens the scope of applicable levels. The illustration below gives you a pictorial view of how this works. The links in part 1 provide you with references to in-depth details on how this works and more.
Using a built-in policy
The simplest scenario to use for your first policy exploration is to use one of the many built-in policies available to you. In the example I share here, I will be using the following scenario:
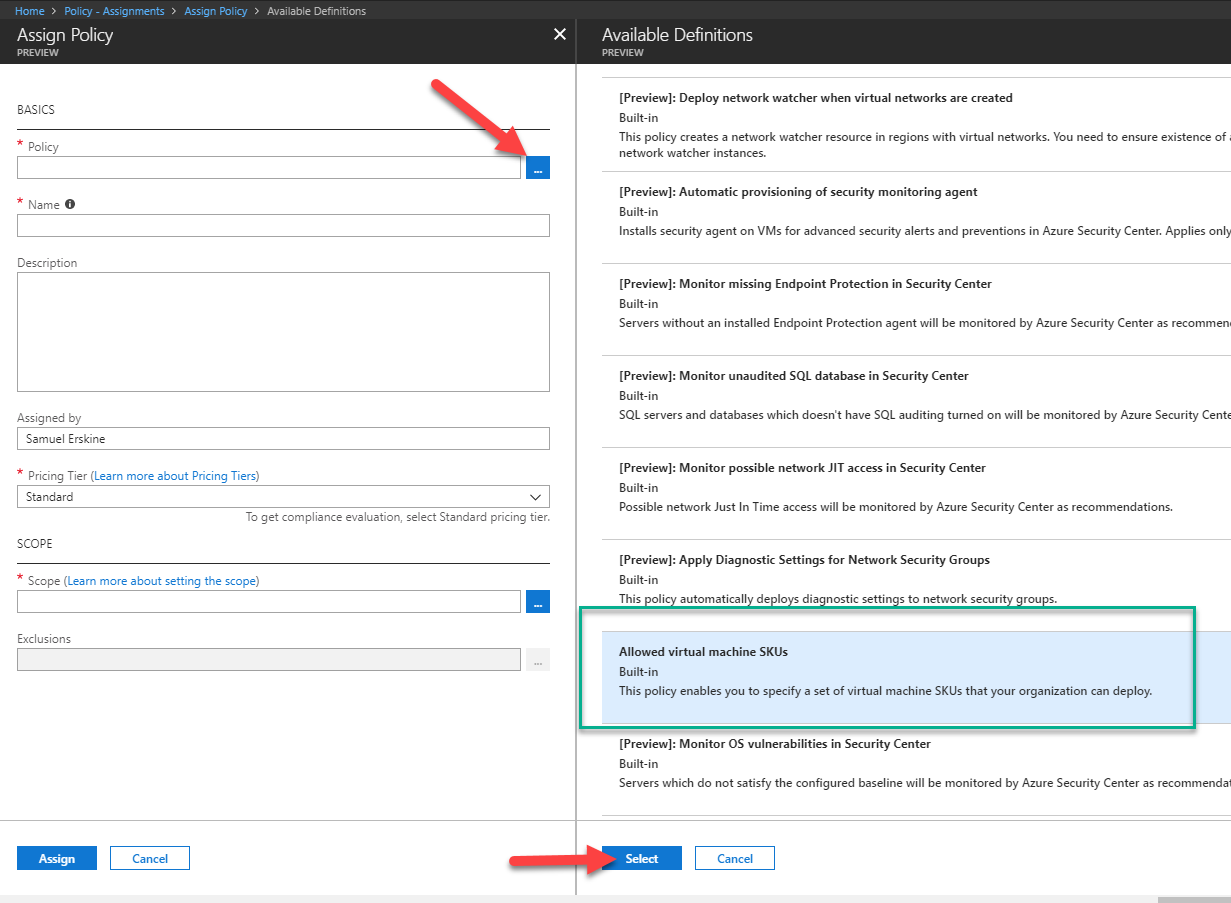
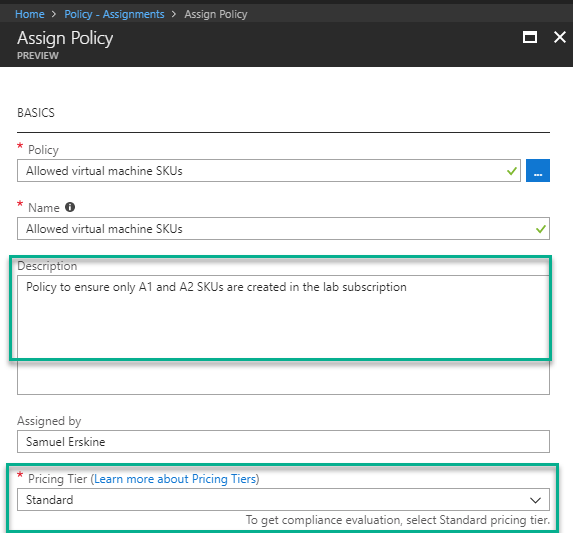
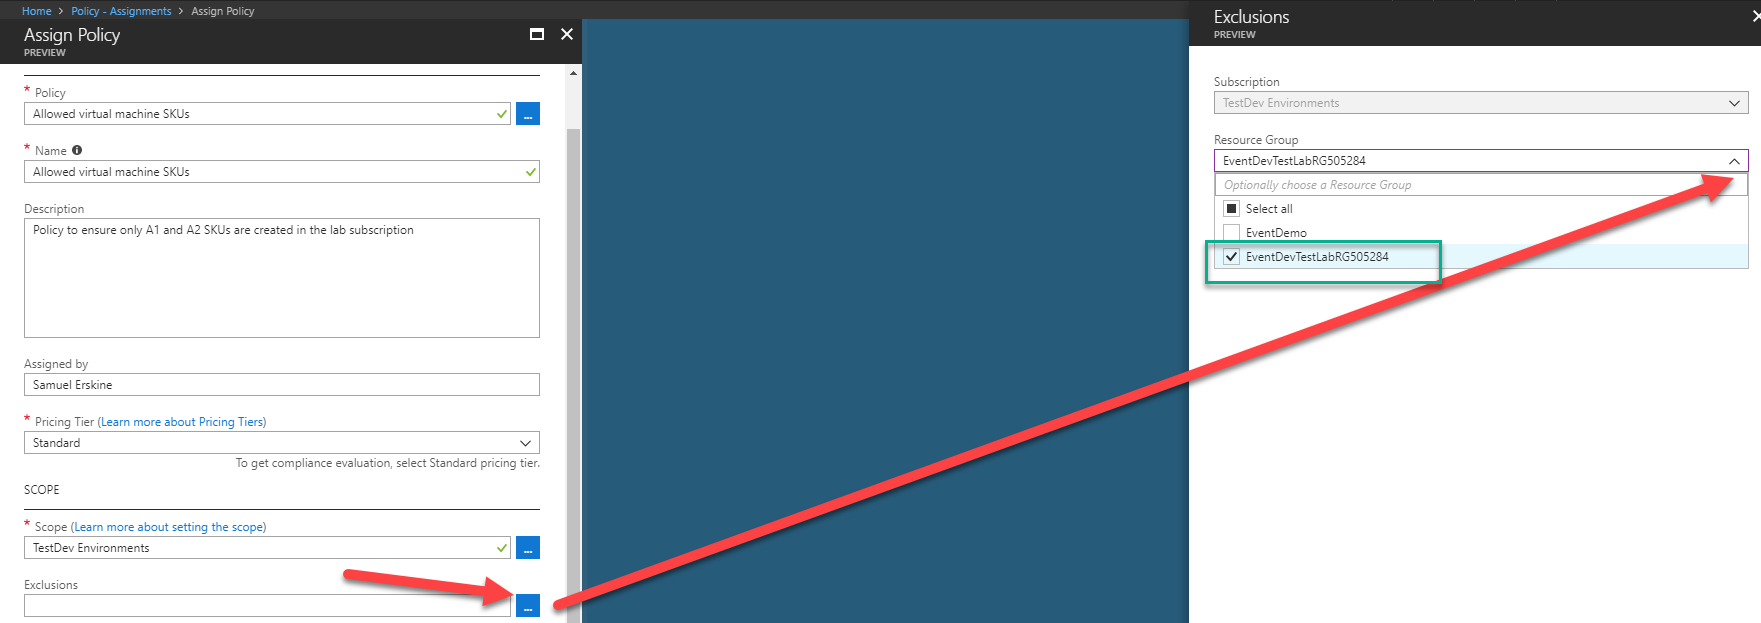
Assign a policy that is only applied to the development team subscription. This policy will only allow authorised users the ability to create virtual machines in two SKUs (A1 and A2 virtual machines ). Additionally because the subscription has a DevTest lab resource group, we will exclude that resource group. The reason for the exclusion is, DevTest labs in Azure come with their own policy framework and the administrator of this environment has already restricted users from creating these SKUs
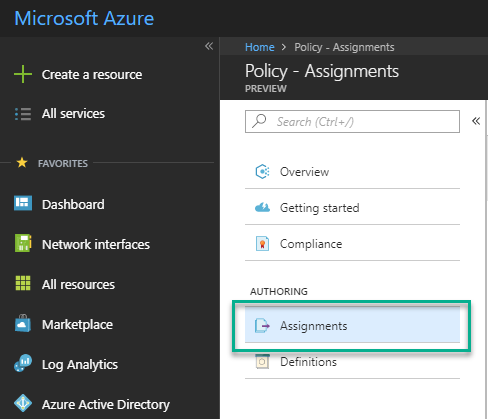
Here are the steps (See how to enable Azure Policy here. I assume you have already enabled Azure Policy which is in preview at the time of writing this blog)
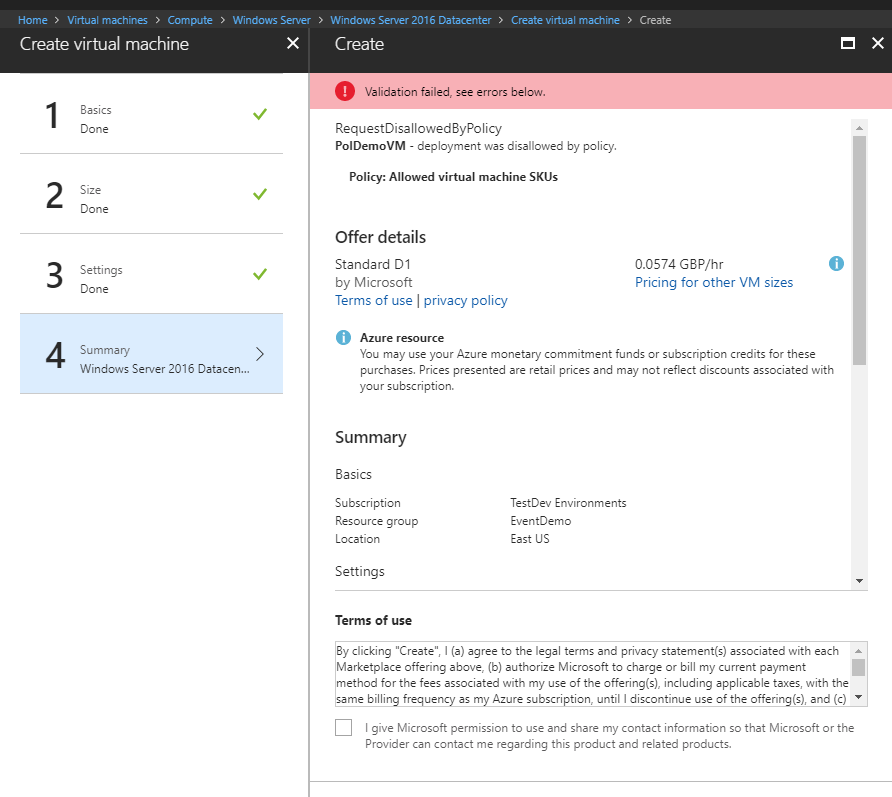
To validate the policy works, we will attempt to create a VM and select a SKU not in our allowed list. After filling in all the details , you should get a similar error to below and will be prevented from creating the VM
This will not affect the exclusion resource group. I will however leave you to validate that little part. Watch out for part 3 where we build on the policy and move into Initiatives.
Checkout MVP Steve Buchanan blog post for additional information
